0 Comments

I’ve had the chance to be involved in an exciting opportunity developed by tutors and students at UCS designed to encourage a new body of work.  The 10PRJCT encourages one artist each week over a period of ten weeks to work in an installation space in the arts building on campus.  The participants are expected to develop the work based around the number ten, in whichever way they choose to view it.

10 PRJCT

I managed to pick the busiest week in my timetable to date as my work time so found it stressful at times.  However, being involved in the project was something I wanted as soon as I heard of it.  Not only is it great to be using workspaces that are a bit different to our normal studio areas, being in a different environment, on a different brief meant that my work would get shaken up a bit.

10 PRJCT brainstorming

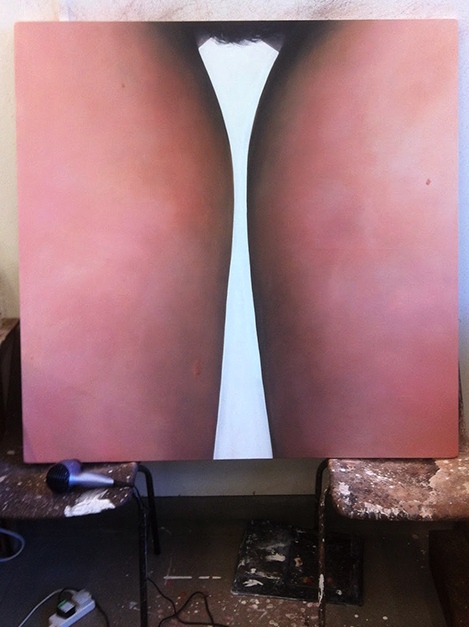
When I first knew about the project, I struggled with the concept of adapting the theme of the number ten into my work.  Although it’s a different body of work, it made sense to me to harmonise it with my current projects.  Themes of feminism, misogyny, patriarchal values and so on run through my work, so bringing the ten theme into this would be important to me.  Brainstorming in the space brought me to the concept of ‘the perfect ten’, an issue that runs through female experience in western society on a daily basis.


10 PRJCT work begins

Having worked a lot with imagery of the female form in paintings and photography, I liked the idea of moving on to working with minimal shapes.  The dimensions of bust, waist and chest circumferences of ‘the perfect dress size ten’ developed into standard circle forms.  After a few attempts at figuring out the maths (GCSE standard at most!! come on Maynard, it’s in there somewhere) the circles stared taking shape.

Developing circle forms

Having begun to work in the space I quickly became aware of the different atmosphere when enclosed and developing a body of work completely alone.  Perhaps this feeling of isolation is added to by the lack of natural light in the room.  Sitting in a windowless box with no distraction completely altered my focus and quickly I became very intent on the work.  Working normally in the studio is a very different experience and I was interested to note the change in habits in such a different environment.

Having a tutorial in amongst this was really helpful on the other hand, as it acted as a kind of link to the outside world.  When I was following the first year of my studies via a remote learning course I found this lack of communication with other artists really detrimental.  Finding a balance between being able to work alone with a direct focus on my work and having contact with other people practising around me is clearly important.

0 Comments

Upon completion of the first attempt at my neon sign I took some time to reflect.  Over the last couple of days, I’ve taken the opportunity to discuss the piece with tutors and various other people.  The more I’ve considered it, the more I feel certain that making the piece aesthetically satisfying in ALL lights is important.  I’m imagining the miraculous but hypothetical event of someone considering paying hard-earned cash for the thing after being bowled over by its brilliance when exhibited!  In that instance I feel it would be vital that the piece is a nice thing in all forms.  Neat, tidy, tactile as well as visually pleasing.

This has brought me back to my thinking of using fishing wire and hidden holes to attach the light wire to the board.  It’s also made me think seriously about transferring the whole thing onto a better board that can be worked on to give a better finish.

So today, this is what I started doing…….

Transfer to second board, chipboard and pencil, 2015, Hannah Maynard

After a hint from one of my fellow students I transferred the layout of the lettering onto a new piece of board.  Although this one is still a bit rough around the edges like the last one,  this one is more easily rescuable.  In order to contain the lettering on the board with no bits hanging off the edges I took some measurements and scaled down the whole thing slightly.  I managed to work quite quickly and draw the lettering to a standard I was pleased with.

Lettering temporarily fixed to second board, 2015, Hannah Maynard, neon strip lights and chip board

To save time, I fixed the light wire to the new board using tape.  This allows me to see that the lettering works well and make any adjustments.  I’ve also started a few tests with the fishing wire set up to make sure this method will keep the shape well enough.

I’m really pleased with myself for having taken the time to really consider the best way of going forward with this project.  I find that I will often, all too easily rush projects just to see tangible results and end up with work that could be so much sleeker.  I want this to be sleek and am looking forward to working on the details to get it that way.  Watch this space.


0 Comments

Having received the extra lights in the post yesterday, I’ve managed to complete the first attempt at the neon sign.

Neon Sign, almost complete, 2014, Hannah Maynard, neon strip lights, chip board

Initially I was unsure how to secure the tail of the ‘y’ which s why in the image above it is left hanging.  Because of the placement of the lettering on the board, there was not enough board at the lower edge to fix the tail completely.  With a little experimentation I have managed to secure it in a way that works quite well when illuminated.  Some slight adjustment might be needed to make sure it sits as well as it can but I can do that when I make the finishing touches.

Completed first attempt, 2014, Hannah Maynard, neon strip lights, chip board

Seeing the sign lit like in the image above is very satisfying.  Overall I’m really pleased with the result.  However, there are a few changes I would like to make.  As mentioned in the previous post I’ve been considering using fish wire fed through small holes in the board to secure the lights in place instead of the hundreds of nails which look rough.


Next Steps:

– Source fishing wire

– experiment with fish wire to affix light strips

– clean up board, remove pen, sand edges


0 Comments

I found a perfect board in the workshop which although, ridiculously heavy, is a great size.  It’s also coated in melamine or some such material which makes for a great surface for drawing (and erasing) the script template.

First attempt at script template , 2015, Hannah Maynard, pen on melamine-coated board

Having practiced the style of writing I wanted off the board and on smaller test pieces, I felt  comfortable free drawing the script onto the board.  I used a white board marker to make sure I could erase and re-draw as much as I light until it looked good to go.

Once happy with the writing, I figured there was nothing left to lose so just went at it with a drill to start the first guide holes for the wire lights.

First lights on, 2015, Hannah Maynard, neon strip lights, tape on melamine-coated board

So far so good.  Taking a lot of hammering and so far I’ve only got batteries for one light strip so will only be able to see one section lit at a time!

Although it’s taking a lot of nails to get the contours right for the lettering style, at the moment it feels like the best way to assure a good look when illuminated.

I’m relying on the piece being shown in the dark so that only the light is visible and not the rest of the workings, nails etc.  This was ok in the test piece although in that I only used tape to secure the wire.  Once the whole thing is put together and tested, I will look to see how the finished piece works.  I’m prepared to make adjustments to the finish of the work if the nails stand out too much.  Although the piece should be shown in the dark, I feel it would look more streamlined and professional if it looked pleasing in full light as well.  Kind of like making sure the back of your needlework is as neat as the front?!?!?!

Next steps:

– Complete this first test piece

– Source enough batteries to light all lights at once

– prepare alternative fixing strategy in case finish of nails is not good enough


0 Comments

So researching costs for building a neon sign brought some bad news…….Expensive!!

Which has led me to investigate possible cheaper alternatives.  I’m hoping this has been a success and will be putting together some test models to see if I can make a go of it.

Test model for neon sign project, 2014, Hannah Maynard, neon strip lights and tape on board, approx 60x40cm

For the test model shown above I have used the cheap alternative neon strip light which is like a long glow stick with an attached battery pack.  By drawing out the lettering on a white board and taping the strip light along the template I have been able to mock up a smaller version of the end result.

The test has demonstrated the need for a more permanent fixing for the wires.  Also, I’ll need to drill holes through the board in order to feed through the excess wires so that the linking parts between words and the battery packs are all hidden.  Instead of tape for fixing I think using small nail pins to guide the wire into the right places should be an effective way of doing it.

Next steps:

– source more lights

– source a large board

– get drawing the template writing


0 Comments